
A couple of months ago I decided to finally get around to doing my Foundation license for Amateur Radio. I was successful, got assigned my callsign, and went out and bought myself a basic radio kit. I’m mostly interested in the QRP (low power) side of things, and constructing my own equipment, antennas and that sort of stuff.
The basic Foundation license gives you access to transmitting on the 80m, 40m, 15m, 10m, 2m, and 70cm bands, with varying power and bandwidth limitations (max power is 10 watts PEP). For those who don’t know, those values are wavelengths, which correspond to frequency ranges, and are commonly used by amateurs because they’re a bit easier to handle when talking about an entire band. The Foundation license also permits the use of any mode (eg, Morse/CW, voice, various data modes etc), and you can use equipment you’ve built yourself. That’s a recent change to the license.
Building a Transceiver
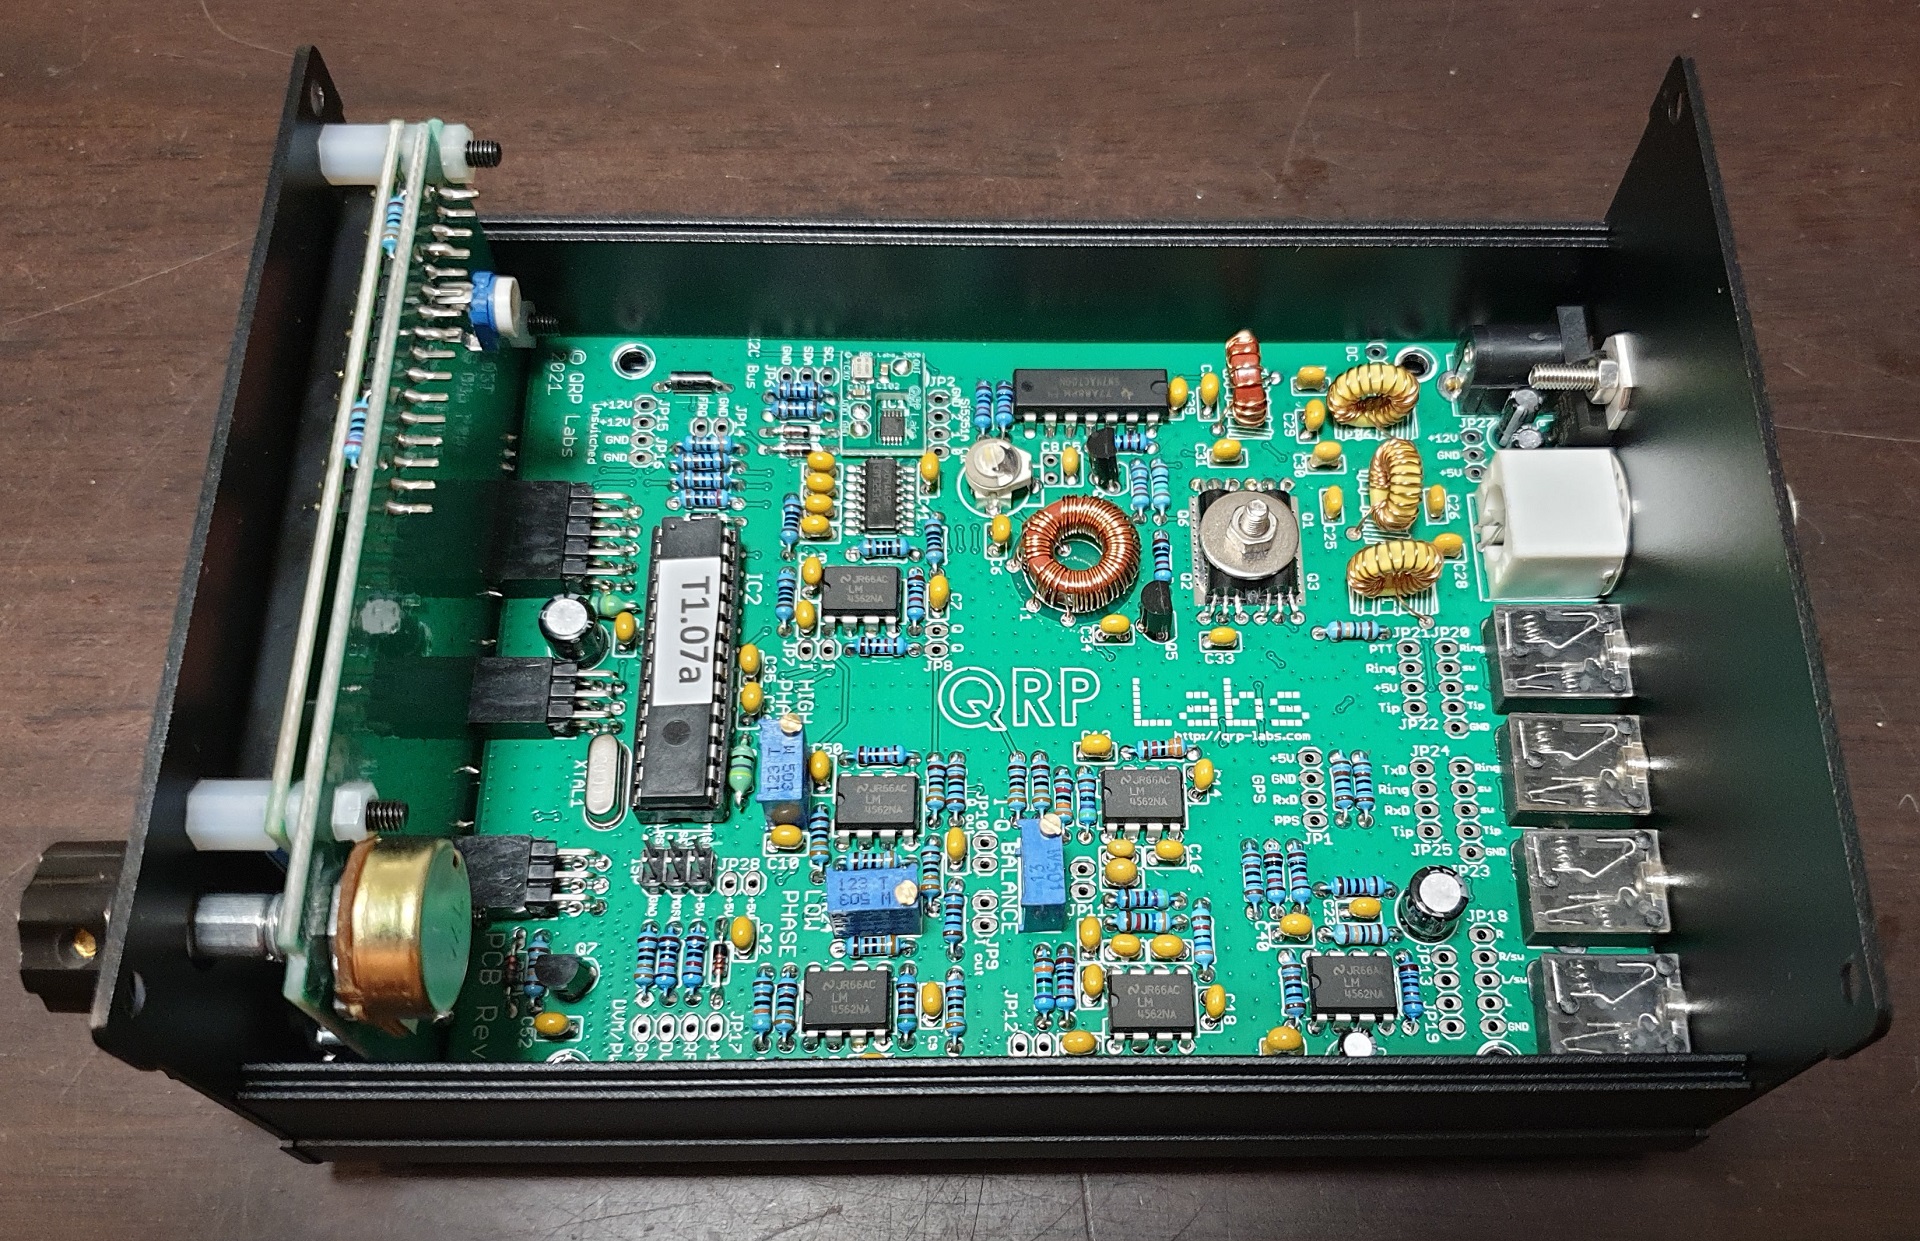
So I went and ordered a QRPLabs QCX+ transceiver kit. The kit comes unassembled (except for the two SMD chips already soldered to the board), and you put it together. It’s intermediate difficulty, and by far the most annoying part of the assembly was accurately winding the toroids (yes, you wind your own RF transformers when you build it). Long story short, here’s the completed kit. I got the 40m version.
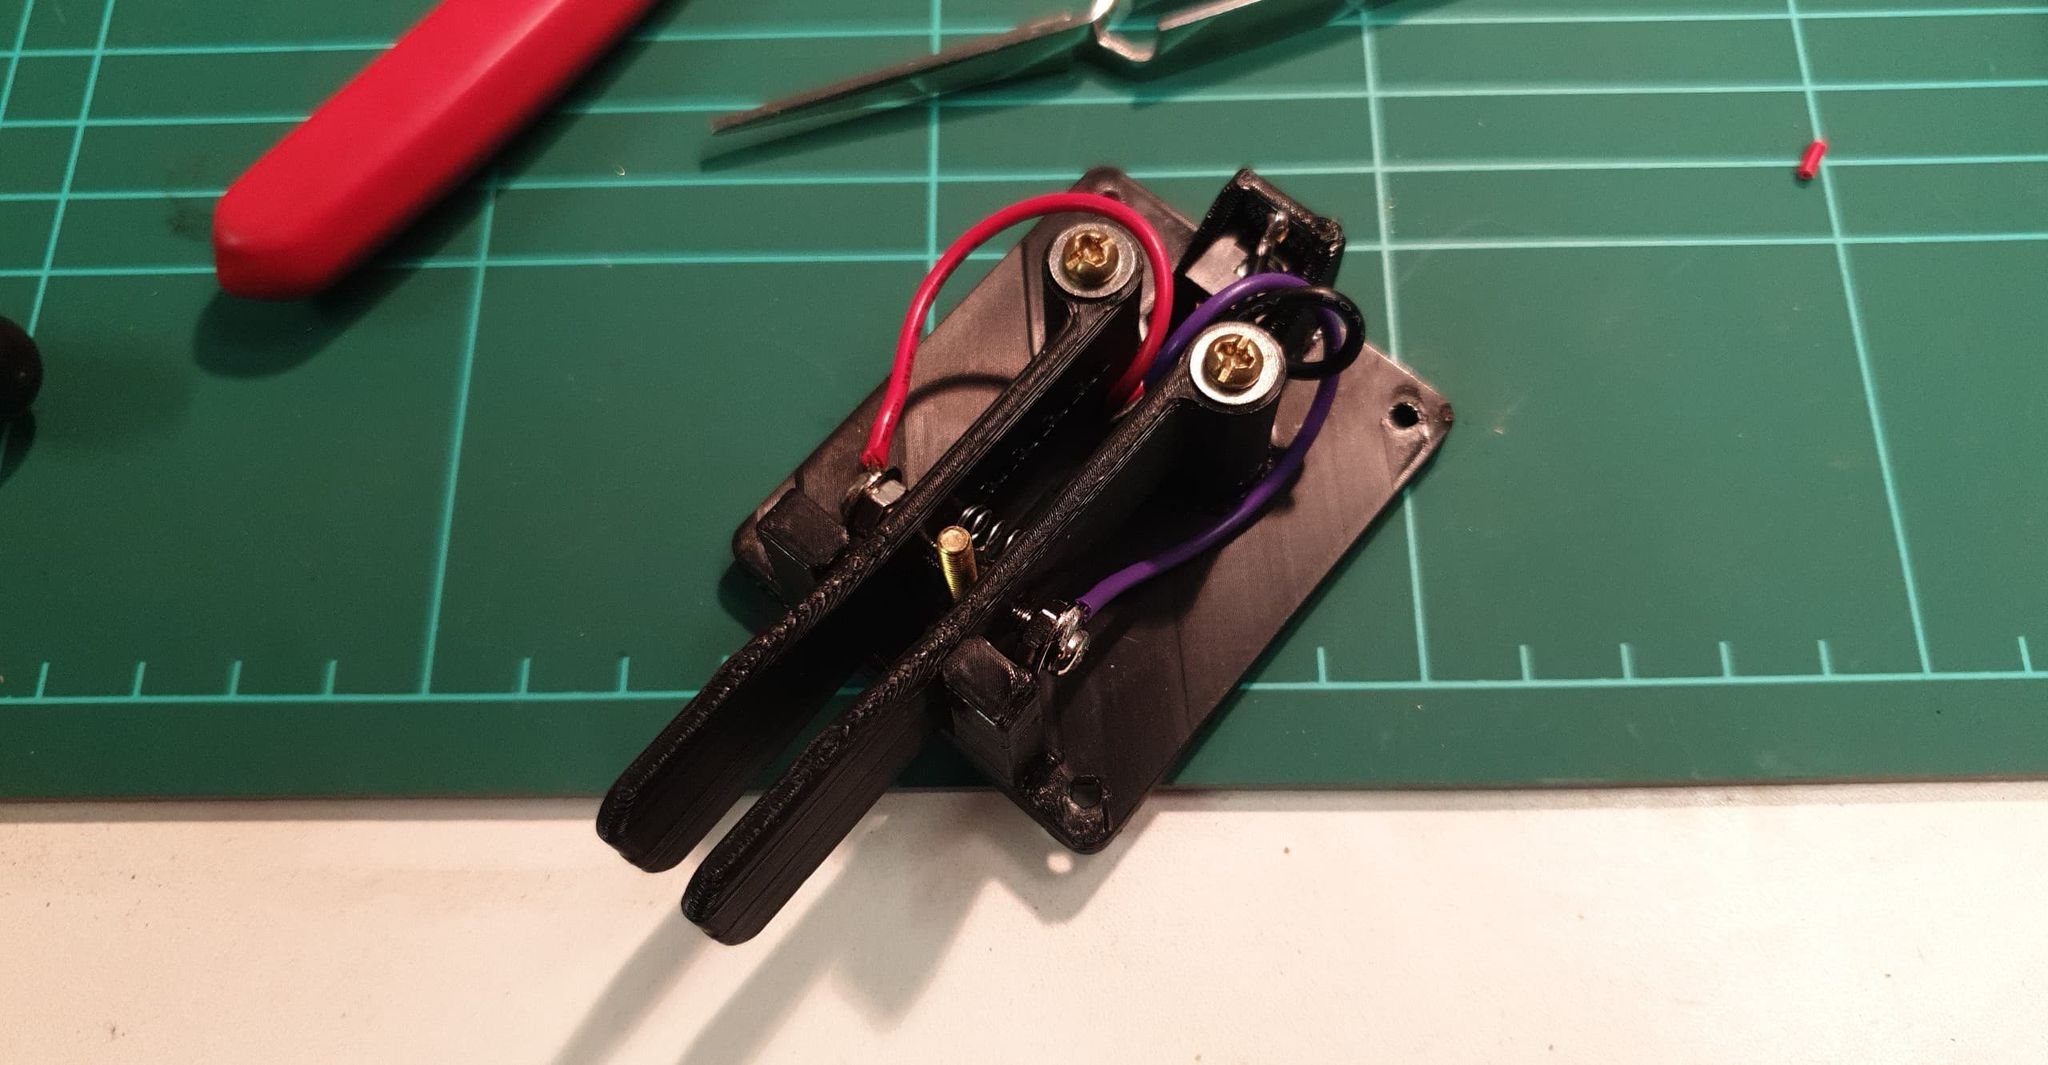
The QCX+ is a CW transceiver - that is, it’s primarily intended to do Morse Code. I, of course, don’t know morse, which presents a bit of a problem. But I’m learning it at LCWO, althou that’s pretty slow going. I also 3d printed myself an iambic paddle - a special type of Morse key which does dits (the dots) on one paddle, dahs (the dashes) on the other paddle, and if you press both paddles it repeats a sequence based on which paddle was closed first. It reduces the amount of banging away on a key required.
Receiving a signal
I also got hold of an ATU-100 automatic antenna tuner, and some other bits and bobs. Then, stringing a wire across the yard, picked from a ‘random’ length, I was able to tune it up. I was able to do the mandatory ‘QRL?’ using the embedded messages in the transceiver (I can’t key it myself), verify I couldn’t hear anyone, then do the also-mandatory declaration of my callsign and then ‘22’ to announce my intention to do a radio test, and get the antenna tuned up.
Of note, I did not exactly pick a random length. Turns out for random lengths of wire, you’re not supposed to use an ACTUAL random length in case you pick a bad one. Instead, I followed this guide and picked a length that was ~40 feet. That puts me bang in the middle of a big gap of “OK” lengths for all the bands I’m licensed for (except the VHF/UHF frequencies). The wire was string between two points of my house and the shed, with string to isolate it from the structure so it wasn’t touching it directly.
With that done, I could pick up various people CW’ing away to each other - I picked up two guys having a chat in Morse, with one saying something about he couldn’t stand tepid tea (the transceiver’s built-in decoder told me that). Great success!
So that’s receiving done.
Transmitting a signal
So, I don’t really know Morse, so I can’t do a proper QSO (a contact with another person). But what I can do is use one of the many public KiwiSDR radios that are helpfully provided by the amateur community, and listen to myself using someone else’s radio!
And that is precisely what I did. I picked a SDR that’s fairly near, found a frequency that wasn’t in use, and QSL?’ed on it. My QSL appeared on the SDR’s waterfall, and the CW decoder did indeed decode that text. So transmitting works, and I can get out!
But how far I can get out will remain to be seen…
Automated reporting via WSPR
Next on the menu was configuring WSPR. WSPR, essentially, is an automated protocol for allowing transceivers to send automated messages to each other, declaring location code, callsign, transmitter strength, and then mapping that back to a central service to work out who can hear whom for determining how propagation conditions are working across the world. It’s pretty ingenious.
It also turns out that the QCX+ can act as a WSPR beacon. It’s as simple as configuring the parameters accordingly, setting the time accurately (to the second), and then setting your start time and frames correctly (both should be EVEN numbers otherwise you’ll have trouble), and firing it off.
So I did exactly that. I consulted a nearby KiwiSDR to find a frequency inside the WSPR band that wasn’t in heavy use, configured the QCX+ to use that, then fired up the beacon while watching the SDR to see what happened. First I had some trouble because I didn’t realize that both the frame and offset parameters need to be even. Whoops.
But then I could see my transmission appearing on the SDR waterfall. And a few minutes later, consulting wsprnet showed this…
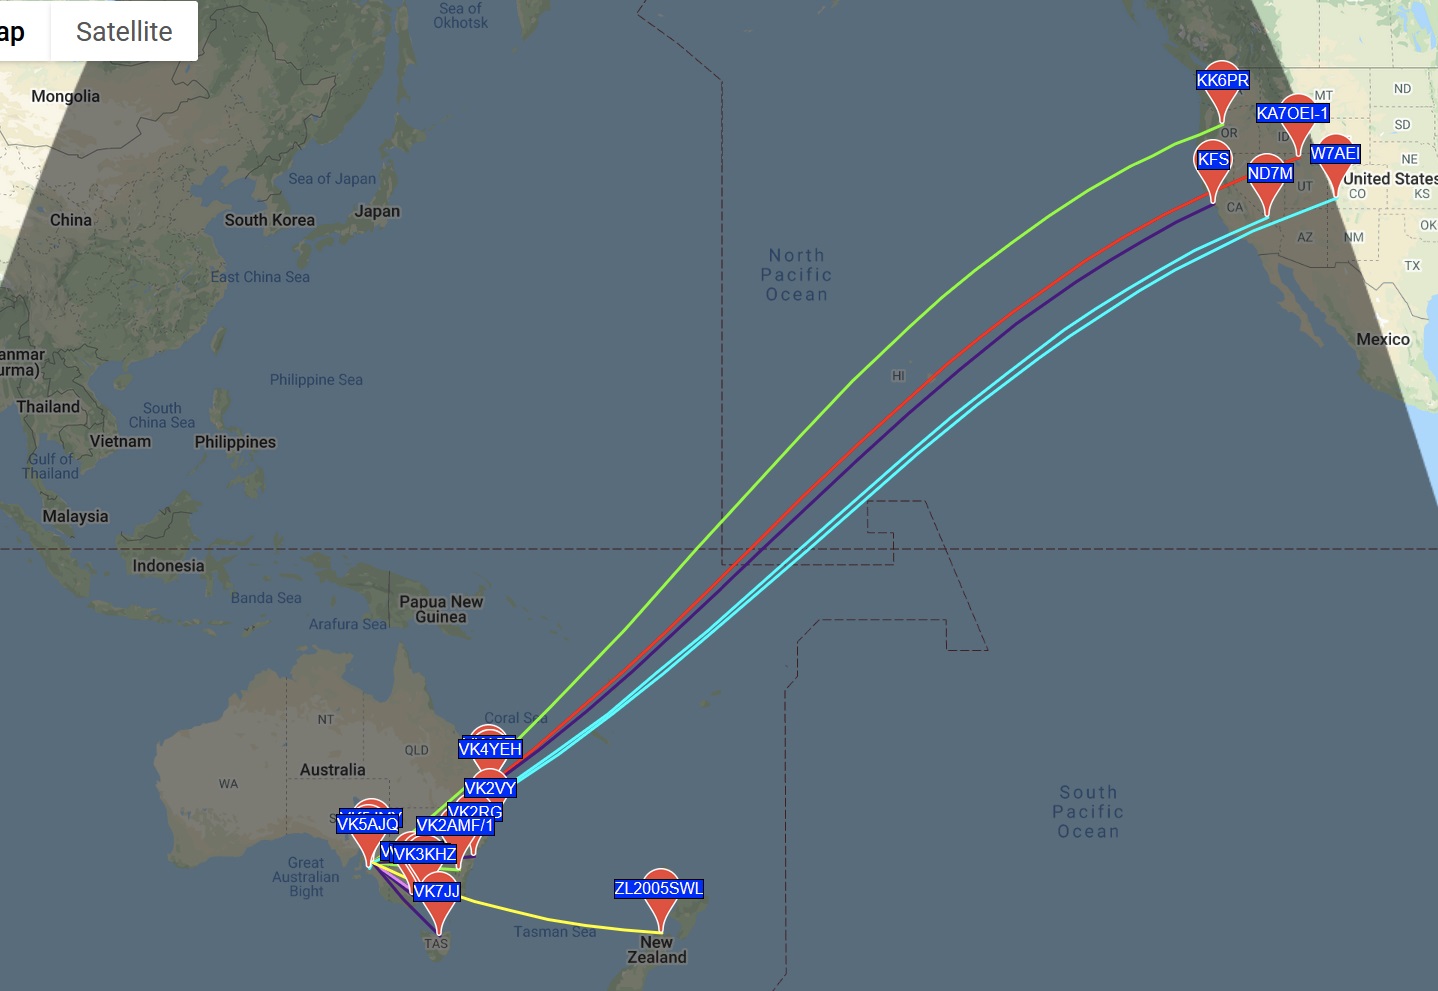
Great success! My random wire strung up 7 ft off the ground, off a kit-built CW transceiver powered by an old UPS battery was heard all the way across the Pacific ocean in the USA. After another couple of cycles it was heard in Canada, and the furthest I saw before I shut down for the evening was a bit over 15,000km away.
What now?!
There’s a pretty huge list of next steps coming up. Obviously I have to learn CW, because I can’t keep leaning on just using the embedded messages. I also need to discover properly whether the QCX+ can act as a WSPR receiver. I don’t think it can, because it’s intended as a CW transceiver.
But what I really need to do is figure out some better solutions for an antenna and a proper grounding system. That will have the biggest effect on what I can do. The problem I’ve got is an antenna for the 40m band is pretty big - a horizontal dipole is 20 meters long for one. So a lot of debate and figuring stuff out is needed.
But at least my (not quite) random wire seems to work.